
- Can You Flush Toilet Seat Covers or Not? - September 15, 2023
- How to Make Sure Gas Stove is Off? – Quick Methods - September 15, 2023
- Can An Air Mattress Burst or Not? – (Little Known Facts!) - September 15, 2023
Wooden floors lend natural and aesthetic beauty to a home unmatched by tiles, but you saw several scratches? Now you are wondering how to remove scratches from wooden floor.
While a polished, unmarred wooden floor adds a luxurious charm to your home, widespread scratches or worse, several gouges can be an eyesore.
Most homeowners follow basics like using rugs or protective pads around their furniture to avoid damage. But accidents do happen, and floors do get ruined.
When everyday wear and tear begin to show, it is essential to know how to remove scratches from wooden floors and restore their finish.
Maintenance, of course, is key to preserving the integrity of your wooden floors.
Simple preventive steps like removing shoes before walking on wooden floors, or using gentle cleaners like soap and water will help increase your floor’s shine.
Switching from a broom to a vacuum cleaner will also minimize scratches on your floor. If however, wooden flooring appears lackluster or it has scratches or gouges in hard-to-ignore areas.
The budget-conscious can attempt DIY repair tips before deciding whether or not to call a professional.
Things to Consider
The first step is to understand what kind of coating was applied to the wooden floor. This is important as not all floor polishes are restored with a simple wax and buff or sand and stain routine.
Pre-1970, wooden floors had a varnish or shellac finish.
Today, you have options like oil or water-based polyurethane, wax or aluminum oxide coating, or stain.
Since different finishes require different fixes, identifying what was used on your floor will save you a lot of time, effort, and money and prevent further damage.
The second step is to judge the extent of the damage. Are you dealing with scratches on wooden floors, shallow or extensive scrapes, or deeper gouges?
Minor repairs and fixes can be done without professional help.
However, major repairs that include stripping or sanding the entire floor are best handled by a professional as they have the expertise and the tools necessary.
How to Remove Scratches from Wooden Floors
To minimize or altogether remove superficial marks and discoloration, follow the scratch repair tips and tricks below.
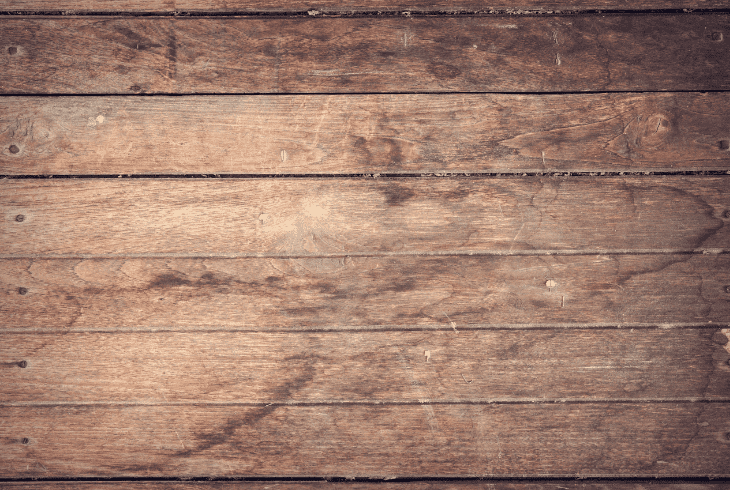
Surface Scratches
As the name suggests, a surface-level scratch only affects the protective coating on the floor. Consider these natural, chemical-free solutions for your home.
Apple Cider Vinegar
Readily available ingredients like apple cider vinegar and olive oil make for convenient DIY solutions that are known to work perfectly on surface scratches.
Mix the two liquids, apply on the area, and wait for several hours before wiping the mixture away.
Walnuts
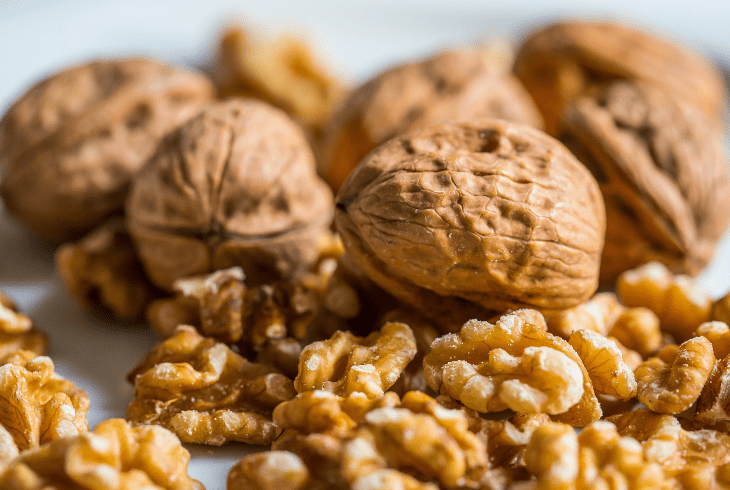
Walnuts are naturally oily with a brown tint. This wonderful combination of oil and color can repair and reverse lackluster.
Massage the nut between your fingers for a few seconds to release and warm the oil, and then rub on the scratched area in small, circular motions.
Wait a few minutes before buffing with a soft cloth.
Coconut Oil
Coconut oil is another natural, chemical-free way to minimize the appearance of scratch marks. However, it is best used on unfinished or recently sanded floors.
Use a sponge and spread a thin, even layer on the desired area. Wait for about five minutes before polishing the patch with a soft cloth.
Olive Oil and Baking Soda

Olive oil and baking soda can also reduce and even remove scratches from wood floors, depending on severity.
Soften baking soda with a few drops of olive oil and apply to freshly vacuumed or cleaned floors.
After about a five-minute wait, buff using a soft sponge. Follow with a damp cloth to remove deposits and dry with a towel.
If the improvement isn’t noticeable, you’ll need to follow additional steps.
Cleaning the Surface
Cleaning before repairing your floor’s surface is vital as it removes dust and grime. Removing dust and other particles will also protect your floor from further damage.
Don’t use abrasives like scouring pads or brooms. A soft rag or vacuum cleaner will suffice. Simply wipe the area with a rag and hardwood floor cleaner.
If you don’t have a cleaner on hand, a water and soap solution makes for a safe alternative.
Avoid vinegar as it is acidic, and it will worsen the issue. If you have a polyurethane coating, use a water-based solution for desirable results.
Ensure adhesiveness is not compromised by wiping the spot with a damp rag to mop up the cleaner’s traces and let it dry.
Use Fillers to Hide Scratches
Scratches are best hidden with a filler. Use a wax stick for shallow scrapes. Since waxes are available in several shades, pick a color that matches your floor and rub over the troubled area.
Ensure that the gashes are filled by pushing the wax into them with a plastic knife.
As a final touch, rub the spot with a clean, soft cloth. Buffing will smooth the area, mop up extra wax, and restore shine.
Alternative to Wax
While the wax is a quick and clean approach, water or oil-based, gel, or combination varieties of wood stains work wonderfully to minimize the appearance of deep scratches.
Although oil-based paints dry slower, they provide rich and, more importantly, long-lasting color.
Whatever your choice of stain, check your local hardware store for available shades. Water-based should be your first choice as they can be applied quickly and cleaned up well.
Combination stains are meant for floors with polyurethane finishes. Since gels don’t penetrate as easily, they can be used on painted wood.
Once you have the right stain color and type for your wood’s finish, fill the scratch.
Remove any excess stain and let it dry. Greater precision can be achieved if you use stain markers with blending pencils.
A Simple 6-Step Guide
Any damage to the wood’s surface and its protective coating is considered a minor scratch and requires a different approach.
- Begin by cleaning the surface and using a wood cleaner to dislodge debris.
- Gently rub the area with steel wool to remove the scratches.
- Avoid making the damage more noticeable by rubbing with the grain of the wood.
- Stop at frequent intervals to check your progress.
- Blend the edges with small, gentle movements before applying a thin coat of wax.
- Wait for about 10-15 minutes before buffing the area.
Pro tip: if your floor wasn't finished with glossy polyurethane, add an extra layer with paste wax for that enviable glossy shine.
As an alternative, you can use fine-grained sandpaper to eliminate the scratches. As always, sand in the direction of the grain. Once you’re satisfied, apply the stain and allow it to dry.
Pro tip: Do a spot check in a hidden area before applying the stain. This is important if you’re unsure of whether your floor was treated with water or oil-based polyurethane or another finish altogether.
You could also select whether to use an oil or water-based poly coating depending on whether your floor is old or new.
For instance, a water-based polish dries quickly and leaves a clear finish that is ideal for new floors.
An oil-based poly coating, however, leaves a yellow tinge after drying. It darkens over time and thus, suits an older floor’s color.
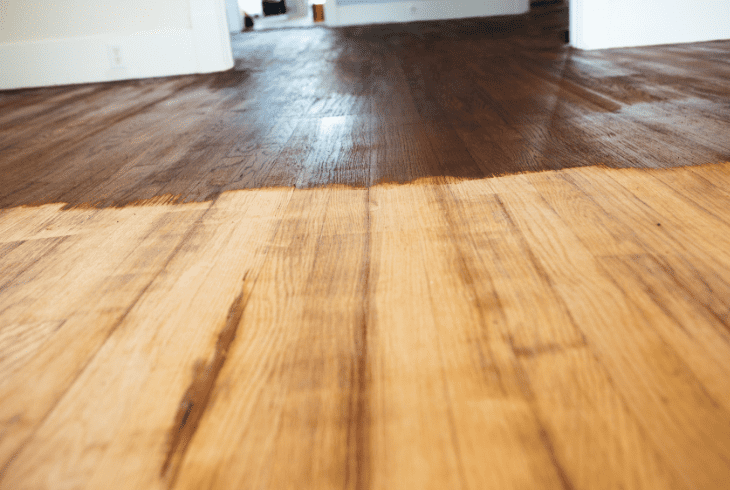
How to Fix Deep Scratches in Wood Floor
These take more work and precision as they need to be sanded and repaired as well as refinished.
Different Approaches
You’ll need to follow different approaches depending on whether your floor is real wood or engineered wood.
Complete floor sanding is ideal as it will remove all scratches with minimal effort.
However, this process is suitable only on real wood floors. Since engineered wood comes with a thin layer of real wood on top, it can only be sanded 1-2 times.
When addressing deep holes, it is advisable to use a wood filler that can be sanded and stained. A pre-colored latex wood filler will work as well if you can find one that matches your floor.
This is an ideal, cost-effective method for small areas.
Addressing Extensive Damage
However, if the damage is extensive and additional steps are required, such as removing layers of polyurethane or wax, perhaps even removing old paint, you’ll need a liquid stripping agent.
After applying the product, you will need to use fine-grade steel wool to remove any excess stripper. If you’re uncertain or lack confidence in handling the chemicals involved, seek an expert’s help.
Should you decide to proceed, here are the steps that you’ll need to follow:
- Use mineral spirits to wet a scouring pad before rubbing on the scratched surface.
- Wait for the area to dry before wiping clean and applying wood putty.
- Push the material further into the gouges using a plastic knife.
- Once the filling has set, sand it down before applying a coat of polyurethane.
- If your floor did not have a polyurethane coating, use the original finish—buff to remove excess and bring a shine to your floors.
Pro tip: Do not use wax sticks on polyurethane floors or apply a wax coating of any kind.
Whether you live in a rental, or you’ve recently bought a fixer-upper that requires some attention, or perhaps you’re in search of a cost-effective way to return your home’s woodwork to its previous glory.
Learning how to remove scratches from wooden floors will help you achieve your goals.