

- Can You Flush Toilet Seat Covers or Not? - September 15, 2023
- How to Make Sure Gas Stove is Off? – Quick Methods - September 15, 2023
- Can An Air Mattress Burst or Not? – (Little Known Facts!) - September 15, 2023
Wood look tile laid wrong? Do you have trouble with how your wood look tile looks?
This article will guide you on the way to relieving yourself of those troubles.
One of the standout features of wood-look tile is how close each tile can be placed during installation. Although it is awesome for so many reasons, it can also be installed wrongly.
What Is Wood-look Tile?

Wood-look tile is a type of flooring made with ceramics or porcelain which looks like wood.
It is a better alternative to hardwood flooring because of its durability, waterproofness, and general ease of maintenance.
These properties make it a good fit for any part of a building (bathroom, kitchen, porch), e.t.c.
It gives both an old and contemporary feel, as well as a touch of nature’s side.
Note: Wood-look tiles are 100% waterproof, unlike hardwood flooring.
Wood-look tile is a complex type of wood flooring to install.
From start to finish, you need to place them correctly to avoid creating an uneven surface.
This will equally help in bringing out its aesthetic. It is a challenging process to achieve.
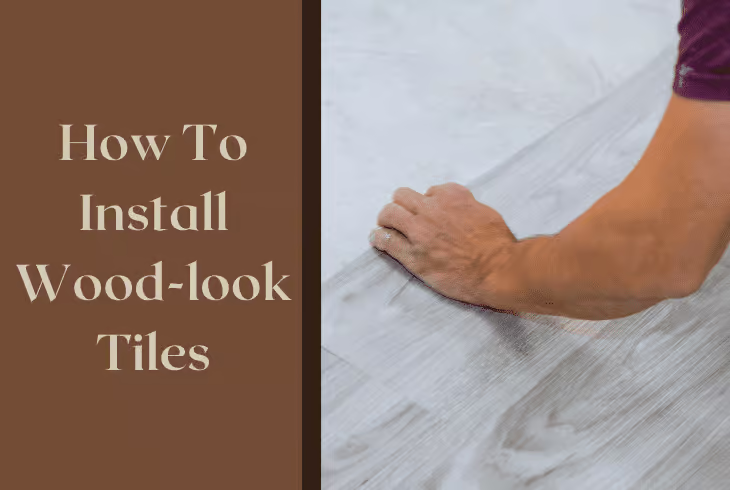
How To Install Wood Look Tile
Before we learn how to fix wood look tile laid wrong, we need to understand how to install it.
We also need to understand why they are laid wrong, and how to detect ones that are laid wrong.
Below are some steps to take when installing wood look tile.
Ascertain Your Subfloor
The material used for the subfloor is crucial. This is because it must be a wood material that would not come apart when exposed to wetness.
Prep The Subfloor Perfectly

As difficult as it is to attain perfection, your subfloor must be flat.
This is because you wouldn’t want to end up with an uneven floor at the end of your project.
Uneven floors are difficult to correct after the placement of the tile.
Fill Any Dips And Valley
These are forms of potholes or cracks that are still found after step two has been completed.
First, place a line across the floor from one end of the room to the other.
If you find any height difference, mark these points and fill them up with the right mortar.
Use a tile leveling system to reinforce the flat surface of the subfloor.
Install Cement Backerboard
This step is used to prevent tiles from cracking. It is done by using the cement backer board to provide a solid surface.
Trowel Mortar And Set Backer Board

Use a trowel to spread the mortar, and place the backer board on the mortar. Make sure to align them carefully to put them in shape.
Place The Wood Look Tile
One very important technique is to place the tile across the room first. Do so beginning with a pair of rows from one end of the room to the other.
It is better to use a tile leveling system to ensure that each row is flat. When this is done perfectly, proceed to align the rest of the tiles in rows.
Note that there is no need to hurry this process, take time to carefully do this.
Tip: Choosing the right tools and materials for your installation will give you the best result, reduce labor and save time.
Why Wood Look Tiles Are Laid Wrong

Uneven Floors
See why it is important for the subfloor to be perfectly flat? This is the first reason why your wood look tile is laid wrong.
Once the subfloor is not even, it destroys the overall outlook of the floor. And it places it at a high risk of cracking with time.
The Spaces Between Tiles

It is important to leave enough space between tiles. This gives greater strength at the end of the work.
Lippage
When the floor is not flat, there is a tendency for tiles to have a higher or lower placement than the next tile in the row.
Differences in tile sizes can also result in lippage.
A lippage is one of the causes of the look and feels of a tile slightly higher or lower than the next tile.
It can also lead to cracking of the tile and some accidental falls.
Patterns
The wood-look tile should have a random pattern in placement. This is to ensure the wood-like effect for aesthetics.
Placements should be done carefully based on markings, sizes, and patterns of the tile.
How To Know When Wood Look Tile Laid Wrong

If you just had a new set of wood look tiles installed, then this is how to know when they’ve been wrongly laid:
Patterns Mismatch
The arrangement of each tile in its rectangular forms should not be laid randomly. It should have the tile beside it in a complete wood-like pattern.
You can use a sample image of an actual wood pattern or compare your wood look tile placement.
Compare it to several others to get an understanding of what is and what should be.
Hollowness
The feel of a sunken area when walking on your tile that seems like space is another thing to watch out for.
This means that not enough material was used for the subfloor, and the tiles may eventually crack.
Here’s How To Fix It!

When a poor adhesive is used in the initial installation of the tile, it is likely to come off from the underlayment.
If this happens, gently remove the loose tile and scrape off the old adhesive used from the back of the tile.
You then apply a good adhesive and place the tile back. This technique may be a temporal fix. It all depends on the number of tiles affected and the kind of adhesive.
When poor underlayment is used in the initial installation, a long-lasting fix would be perfect.
To achieve this, gently remove the tile to avoid cracks and breaks, and remove the previous underlayment. The underlayment could be a plywood subfloor.
Lay down a cement board underlayment (this is a preferred option as it is thicker and heavier than other underlayments), then install the tile all over again.
Note: When the issue is widespread, the best way to resolve the issue is to remove all the tiles, fix the underlayment, and re-lay all tiles again.
Which Direction Should Wood Look Tile Be Laid

Funny how we emphasized how important it is for the subfloor to be perfectly flat. On the other hand, wood look tiles are not flat.
There are basic things that guide the directions in which wood look tiles are laid.
Some of these are stated below.
Natural Light

One of the considerations for wood look tile placement is the main source of natural lights. It is better to run the tile towards the source of natural light in the room.
This helps in better arrangement and eliminates lippage.
The light will run across all aspects of the placement and cast shadows on the tile that may have a height difference.
Vertical/Horizontal Installation
Vertical installation is a better option in most wood-look tile placement.
This is because of its appealing outlook and lengthening effects in a work. It is best to run the flooring from the front through the back of the house.
Although for smaller rooms, it may be better to run wood-look tile horizontally. This will help to create a wide outlook of the room.
Herringbone

This is a more sophisticated wood look tile installation. It t is placed in a diagonal zigzag pattern that typically looks like the letters V, W, and M.
There are other wood look tile laying patterns such as Diagonal, Pattern, and Random Width patterns. All these patterns are whole in themselves.
They are all effective and efficient directions to lay your wood look tile.
Note: There is no generally accepted direction or pattern of wood look tile placement. You’re at liberty to do what works best for you.
Conclusion
You should know that wood-look tile is a fast-growing trend. And using them can be quite demanding so it is commonplace to have your wood look tile laid wrong.
Also, note that the majority of wood flooring used in contemporary times are the different types of wood look tile.
They range from ceramic to porcelain, plywood, bamboo, and plank, amongst several others.
Hopefully, this article helps you understand better how to fix up better.